
Home Repair Emergency Preparedness: A Homeowner's Action Plan
Learn how to prepare for home repair emergencies with a practical action plan, essential tools, and contractor tips to minimize damage and stress.
By Adnan Nazir
Learn more about Home Inspection for guides, costs, and what to expect.
Compare Home Inspection Pros Near You

Enter your ZIP code to compare top-rated local professionals and request free quotes.
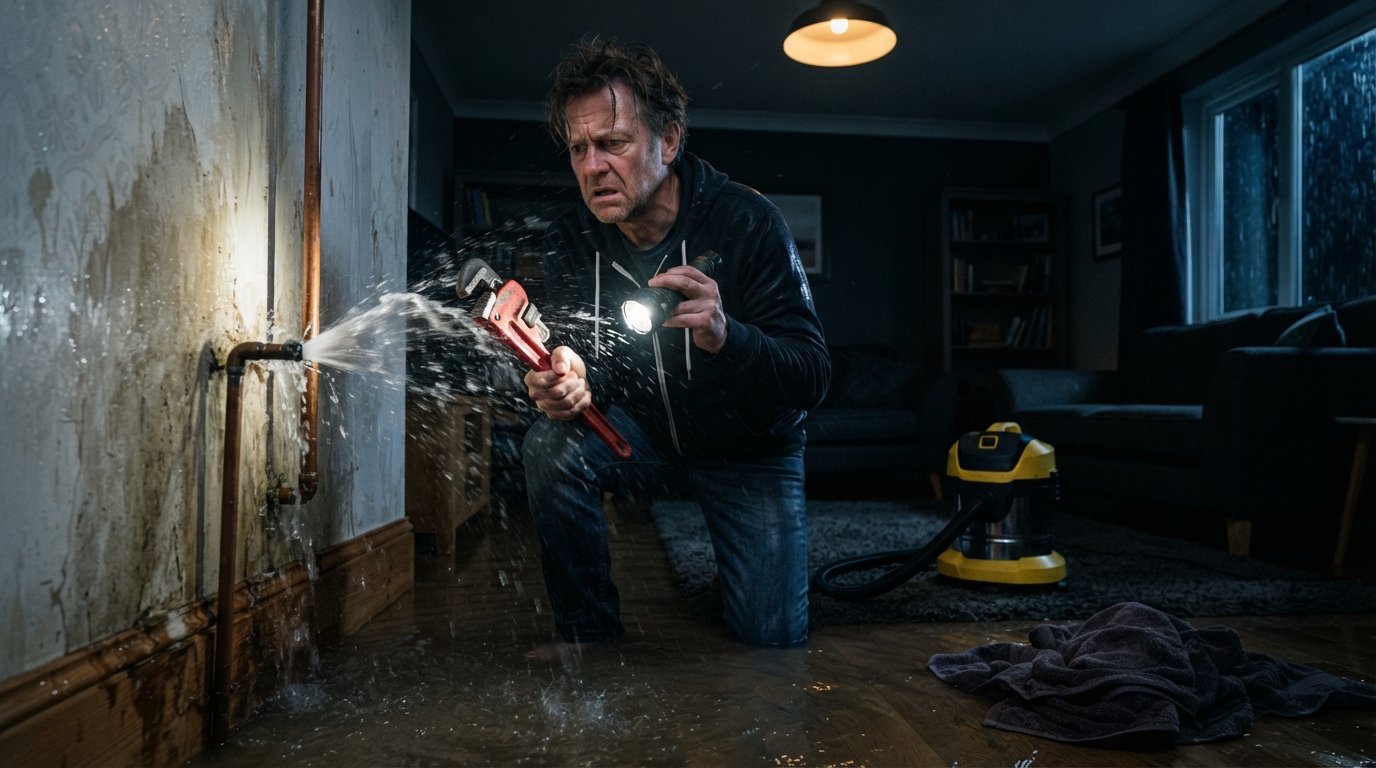
When a pipe bursts at 2 a.m. or a storm tears shingles off your roof, panic can set in fast. You might stand in a puddle of water or stare at a sagging ceiling, unsure who to call or what to do first. That moment of chaos is exactly why home repair emergency preparedness matters. Being ready before disaster strikes does not just save you money; it protects your family, your belongings, and your peace of mind. In this guide, we will walk through a practical, step-by-step plan to handle urgent home repairs with confidence, whether it is a sudden leak, a power outage, or a damaged roof.
This article is designed for homeowners who want to move from reactive scrambling to proactive readiness. You will learn which tools to stock, which numbers to save, how to create a rapid response plan, and how to work with contractors when time is critical. By the end, you will have a clear framework to manage emergencies effectively and minimize damage, so you can get back to normal life sooner.
Why Home Repair Emergency Preparedness Matters More Than You Think
Most homeowners do not think about emergencies until they are in the middle of one. According to the Insurance Information Institute, water damage and freezing are among the most common causes of home insurance claims, and the average cost of a water damage claim is over $10,000. A small leak can become a major structural issue in hours if not addressed. Similarly, a damaged roof after a storm can lead to mold, ruined insulation, and compromised ceilings within days. The financial impact of delayed action is staggering, but it is entirely avoidable with a little forethought.
Beyond finances, there is the emotional toll. When you are unprepared, you are more likely to make rushed decisions, hire the wrong contractor, or accept inflated prices because you feel desperate. Home repair emergency preparedness flips that dynamic. It puts you in control, even in a crisis. You know your shut-off valves, you have a go-to list of vetted professionals, and you have a plan to stabilize the situation before calling for help. That confidence alone is worth the effort.
Moreover, being prepared means you can act quickly to prevent secondary damage. For example, if a tree branch crashes through a window, a quick tarp and plywood patch can stop rain from ruining your floors and furniture. If you know how to shut off your main water line, a burst pipe becomes a contained problem rather than a flooded basement. These small actions, taken early, save thousands of dollars in repairs and make the eventual contractor's job easier and cheaper.
Build Your Emergency Repair Kit: Tools and Supplies You Need Now
You cannot run to the hardware store during a hurricane or a midnight leak. That is why your emergency repair kit should be stocked ahead of time. Think of it as a first aid kit for your house. It should contain basic tools, temporary repair materials, and safety gear. Start with a sturdy toolbox or plastic bin that is easy to grab and carry. Here is what to include:
- Plumbing essentials: A pipe wrench, plumber's tape, a plunger, a pipe repair clamp, and a bucket. Also keep a roll of duct tape and a piece of rubber sheet for quick pipe patches.
- Electrical safety: A flashlight with extra batteries, a headlamp, a voltage tester, and a fire extinguisher rated for electrical fires (Class C).
- Roof and exterior repair: A tarp (at least 8x10 feet), a utility knife, a hammer, roofing nails, and a small pry bar. These are critical for temporary fixes after storm damage.
- General tools: An adjustable wrench, screwdrivers (flathead and Phillips), pliers, a tape measure, and a cordless drill with bits.
Store these items in a location you know and can access quickly, such as a garage shelf or a hall closet. Check the kit every six months to replace used batteries, expired fire extinguishers, or worn-out tape. A well-stocked kit is useless if you cannot find it in the dark.
While you are at it, consider adding a basic first aid kit, a multi-tool, and a pair of work gloves. You might need to clear debris or handle broken glass before a contractor arrives. Safety should always come first, so never attempt a repair that is beyond your skill level. Your goal is to stabilize the situation, not to make it worse.
Know Your Home's Critical Shut-Offs and Systems
One of the most valuable pieces of knowledge in home repair emergency preparedness is knowing how to shut off your utilities. In a crisis, every minute counts, and fumbling with valves or breakers can lead to extensive damage or personal injury. Take an afternoon to locate and label all critical shut-offs in your home. This simple step can be the difference between a minor cleanup and a major restoration project.
First, find your main water shut-off valve. It is usually located in the basement, crawl space, or near the water heater. Turn it clockwise to shut off water to the entire house. Also, locate the individual shut-off valves for your toilet, sink, and washing machine. If a supply line bursts under the kitchen sink, you can cut water to just that area without disabling the whole house. Practice turning these valves so they do not stick when you need them.
Next, identify your electrical panel. Learn which circuit breaker controls which room or appliance. In an emergency, you may need to cut power to a flooded area or a malfunctioning appliance. Label each breaker clearly. Also, know the location of your gas shut-off valve, typically near your gas meter. If you smell gas, shut it off immediately and leave the house. Do not turn it back on yourself; call your utility company or a licensed plumber.
Finally, understand your home's drainage system. Know where the main clean-out is for your sewer line, so a plumber can access it easily. Also, check that your sump pump is working and has a backup battery in case of power outages. These small details make you a more informed homeowner and a better advocate for your property during an emergency.
Create a Rapid Response Plan: Who to Call and What to Do
When an emergency hits, you do not want to be searching for numbers or debating who to call. A clear, written plan takes the guesswork out of the first 30 minutes. Start by listing emergency contacts: your local fire department, police, and poison control. Then add your utility companies (water, gas, electric) and your insurance agent. Finally, include a few trusted contractors: a plumber, an electrician, a roofer, and a general handyman. Save these numbers in your phone and write them on a card that you keep in your emergency kit.
Your plan should also outline the first steps for common emergencies. For example, if a pipe bursts, your first move is to shut off the main water valve, then turn off the electricity to the affected area to avoid shock, and then call a plumber. For a roof leak, your first step is to place a bucket under the leak, then tarp the roof if it is safe, and then call a roofing contractor. Having these steps memorized or written down prevents panic and ensures you act logically.
Practice a few scenarios with your family. Walk through what to do if the basement floods or if a tree falls on the roof. Assign roles: one person calls the contractor, another shuts off the water, and another moves valuables. This rehearsal makes the real event less overwhelming. It also helps you identify gaps in your plan, such as missing tools or unclear shut-off locations, so you can fix them before an actual emergency.
Work With Contractors in an Emergency: Getting Fast, Fair Service
In the aftermath of a disaster, you might feel pressured to hire the first contractor who knocks on your door. That is often a mistake. Emergency situations attract scammers and unlicensed operators who prey on desperate homeowners. Home repair emergency preparedness includes knowing how to vet and hire contractors quickly without getting burned. Here is a mini-framework to guide you:
- Get multiple quotes. Even in an emergency, try to get at least two or three estimates. This gives you a baseline for fair pricing and helps you compare services. Many contractors offer emergency response and can come out within 24 hours.
- Verify licenses and insurance. Ask for their license number and proof of insurance before they start work. A legitimate contractor will readily provide this. You can also check with your state's licensing board.
- Get a written estimate. Insist on a detailed, written estimate that includes labor, materials, and a timeline. Do not rely on verbal promises. A clear contract protects you if disputes arise.
- Ask about warranties. Reputable contractors stand behind their work. Ask about warranties on both materials and labor, and get that in writing.
- Use a referral service. Consider using a platform like Repairmen that connects you with vetted, licensed professionals. This adds a layer of trust and saves you time.
After you choose a contractor, document everything. Take photos of the damage before repairs begin, keep all receipts, and log every communication. This documentation is crucial for insurance claims and for holding the contractor accountable. Also, be wary of contractors who demand large upfront payments or cash only. A typical deposit is 10 to 20 percent of the total cost, not the full amount.
If you are working with insurance, your contractor can often help you navigate the claims process. They can provide detailed estimates and inspections that support your claim. However, remember that you are ultimately responsible for the repair decisions. Stay involved, ask questions, and do not sign anything you do not fully understand.
Insurance and Financial Preparedness: Know What You Are Covered For
Your home insurance policy is your financial safety net in an emergency, but only if you understand what it covers. Many homeowners discover too late that their policy excludes certain types of damage, such as flooding or sewer backups. Take time to review your policy and talk to your agent about add-ons like flood insurance or water backup coverage. These are often inexpensive and can save you tens of thousands of dollars.
Create a home inventory: a list of your possessions, their estimated value, and photos or videos of each room. This inventory is invaluable when filing a claim, as it proves what you owned and helps you get fair compensation. Store it digitally in a cloud service or with a trusted relative. Also, keep copies of important documents, like your policy, deed, and contractor licenses, in a fireproof safe or digital backup.
Finally, set aside an emergency repair fund. Even with insurance, you will likely face deductibles and uncovered expenses. A fund of $2,000 to $5,000 can cover urgent repairs like a new water heater or a temporary roof patch while you wait for insurance. This fund gives you the freedom to hire a reputable contractor without financial panic. If you cannot save that much, start small and build over time. Every dollar you stash away is a step toward resilience.
Seasonal Preparedness: Anticipate Weather-Related Emergencies
Different seasons bring different risks. A proactive homeowner prepares for the specific challenges of each season. In winter, the primary threats are frozen pipes and ice dams. Insulate exposed pipes, seal gaps around windows and doors, and keep your thermostat at a minimum of 55 degrees even when you are away. Clean your gutters before winter to prevent ice dams, and know how to safely remove snow from your roof if it gets too heavy.
Spring and summer bring storms, hail, and heavy rain. Check your roof for loose or missing shingles before storm season. Trim tree branches that hang over your house, as they can break and cause damage. Test your sump pump and install a backup battery. Also, ensure your gutters and downspouts are clear and direct water away from your foundation. These simple steps can prevent the majority of storm-related emergencies.
Fall is the time to winterize. Drain outdoor faucets, store garden hoses, and shut off outdoor water valves. Inspect your heating system and replace filters. Check the seals around windows and doors to keep warmth in and moisture out. By staying ahead of the seasons, you reduce the likelihood of a surprise emergency and keep your home safe year-round.
Remember that home repair emergency preparedness is not a one-time task; it is an ongoing practice. Revisit your plan every few months, update your contacts, and refresh your supplies. As your home changes and you learn more about its systems, your preparedness will evolve. The goal is to build a habit of readiness so that when something breaks, you are not just reacting; you are responding with a clear head and a practical plan.
In the end, the best emergency is the one you are ready for. By taking these steps now, you are protecting your biggest investment and ensuring that a sudden repair does not turn into a long-term disaster. You are also giving yourself the gift of peace of mind, knowing that you can handle whatever comes your way. So start today: build your kit, learn your shut-offs, write your plan, and connect with a trusted contractor before you need one. Your future self will thank you.